Settings
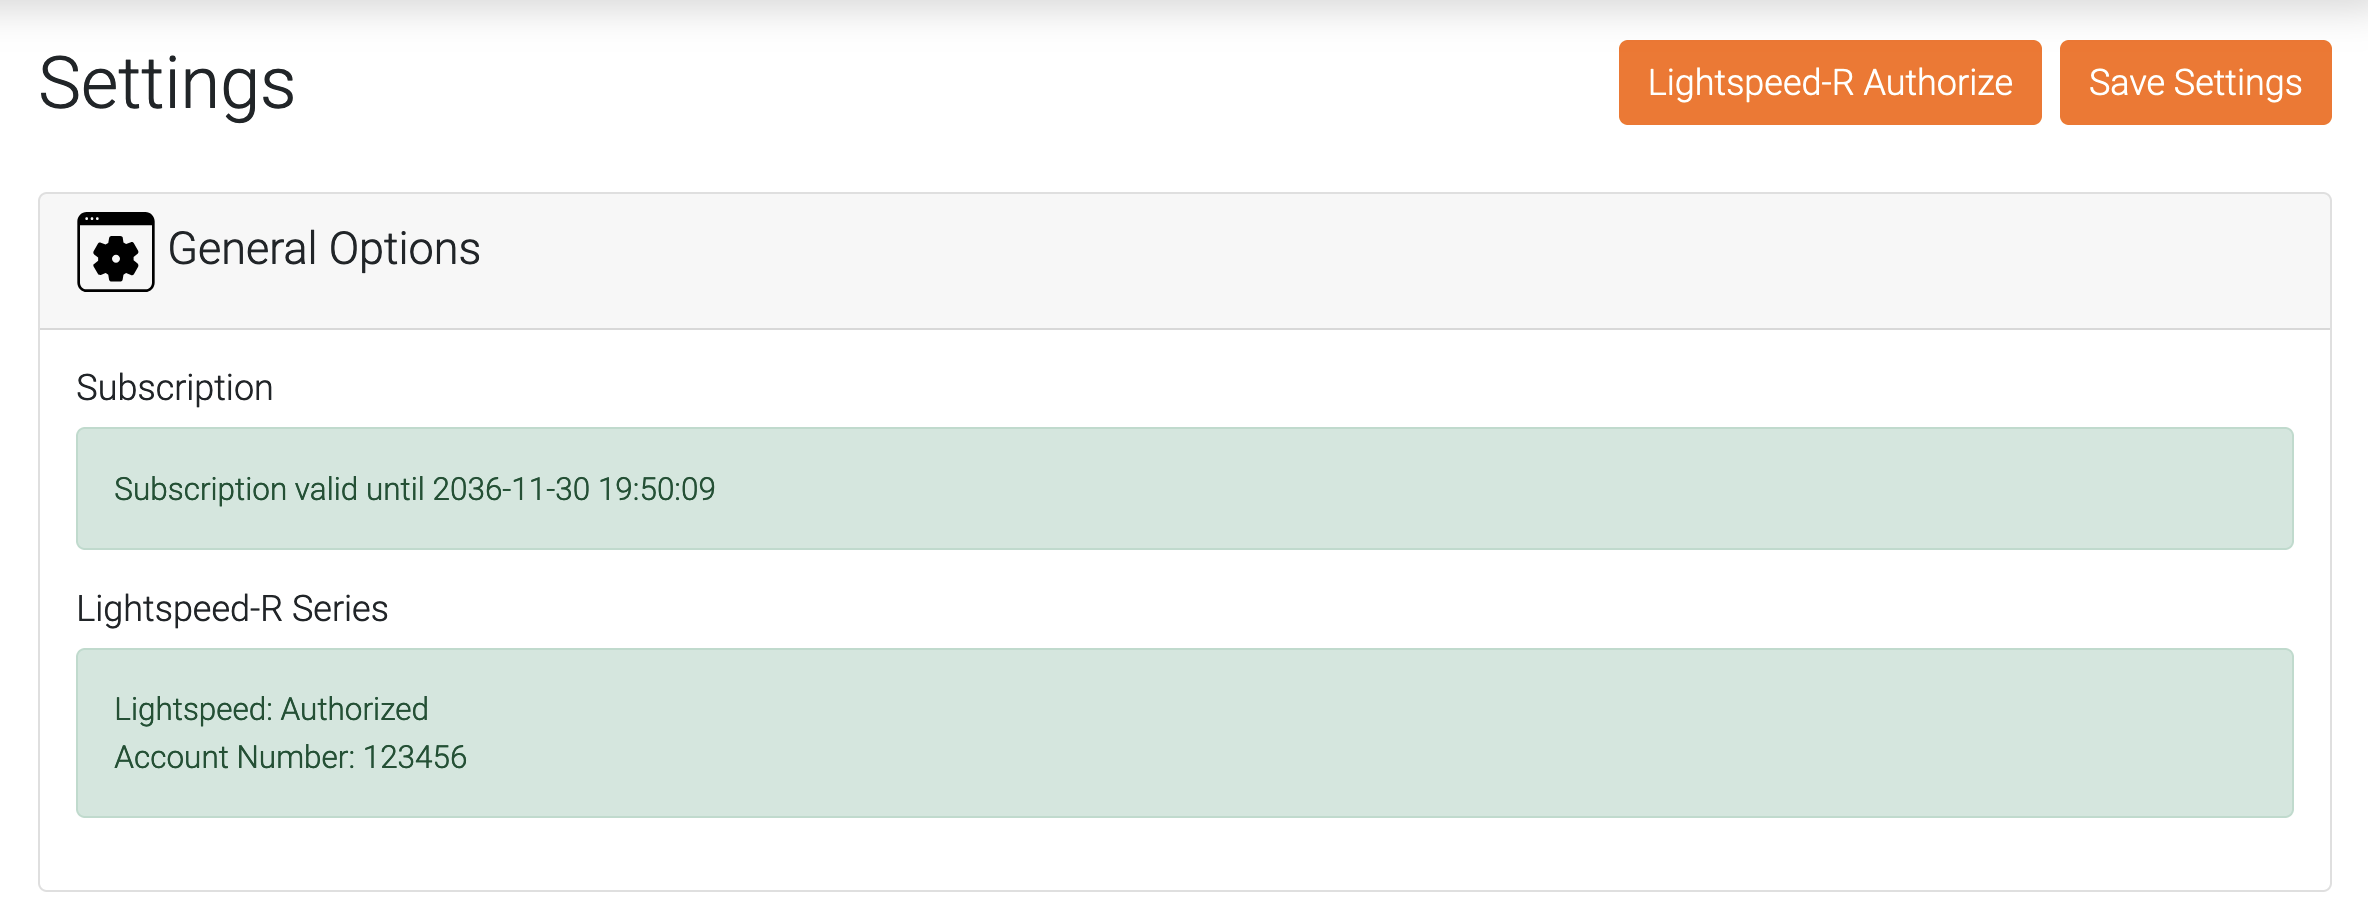
Lightspeed-R Authorize
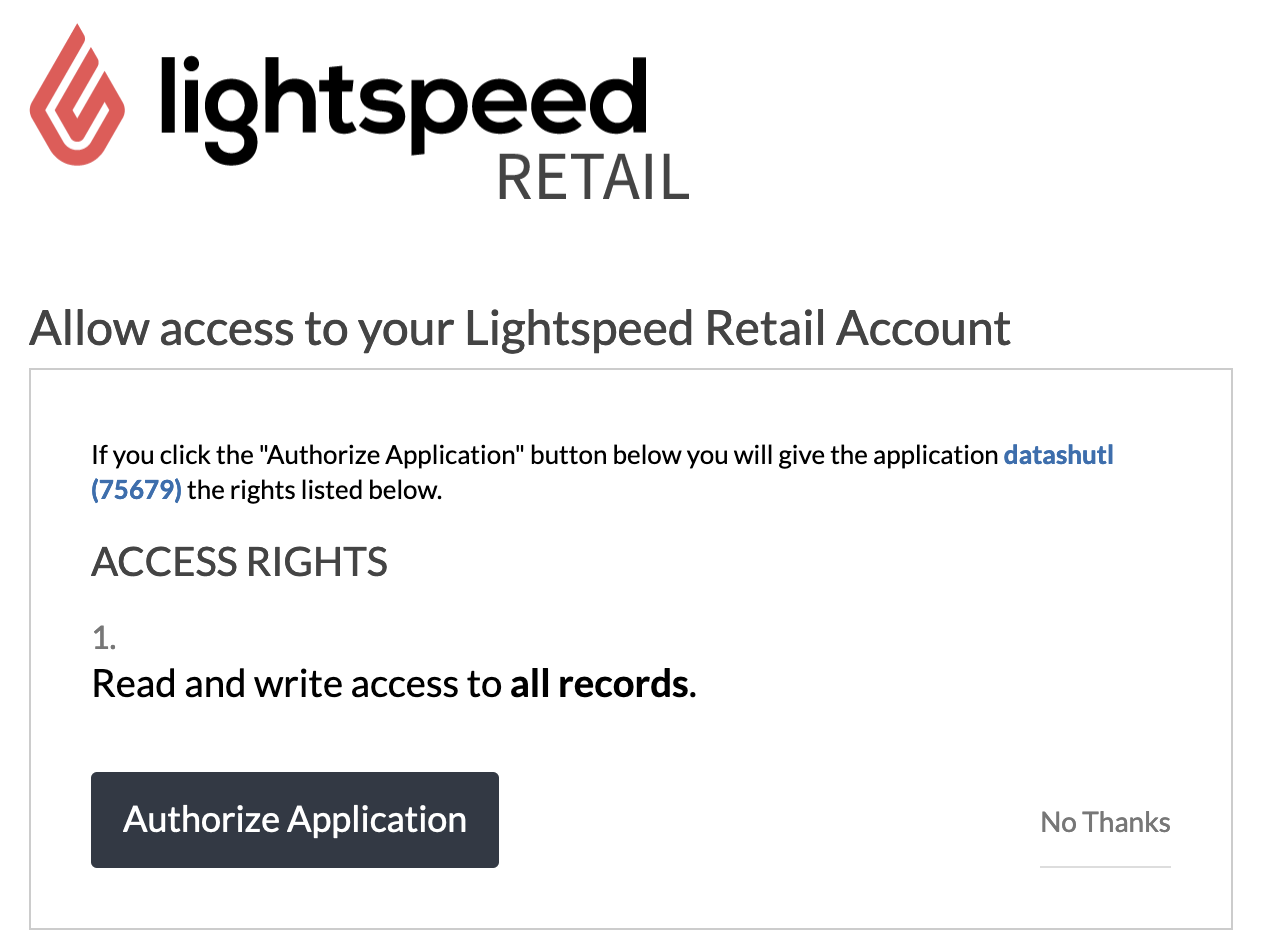
Use this button to authorize the datashutl application in your Lightspeed-R series account. To authorize with Lightspeed:
- Click the "Lightspeed-R Authorize" button. You will be redirected to Lightspeed-R login.
- Login to your Lightspeed Admin account.
- Click the "Authorize Application" button to allow access. You will be redirected back to datashutl once complete.
Import Options
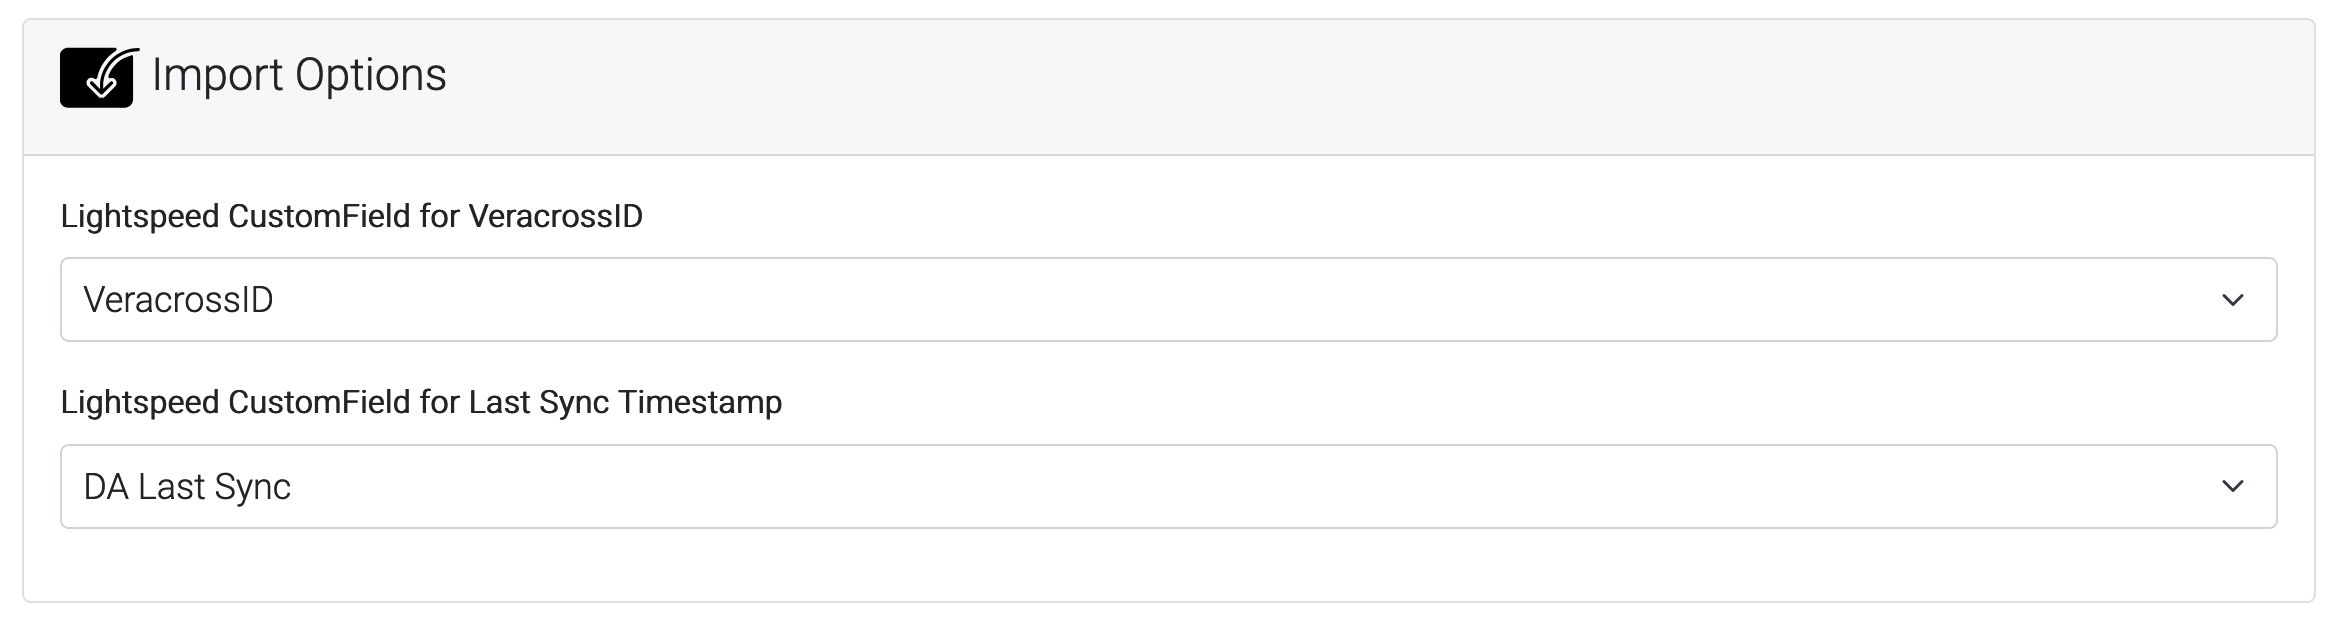
Custom fields are required to track information about a customer's sync. Once the application is authorized with Lightspeed, you will be able to set these fields. To create the fields required, navigate to Settings in Lightspeed and select "Custom Fields".
Custom Field VeracrossID
This field will be mostly informational to the store employee. This will tell the employee which Veracross record number this customer belongs to.
This field isn't used to match customers in Veracross. Matching is performing using an internal hidden field named companyRegistrationNumber.
Custom Field Last Sync Timestamp
This field will let the employee know when this record was last updated by datashutl.
Export Options
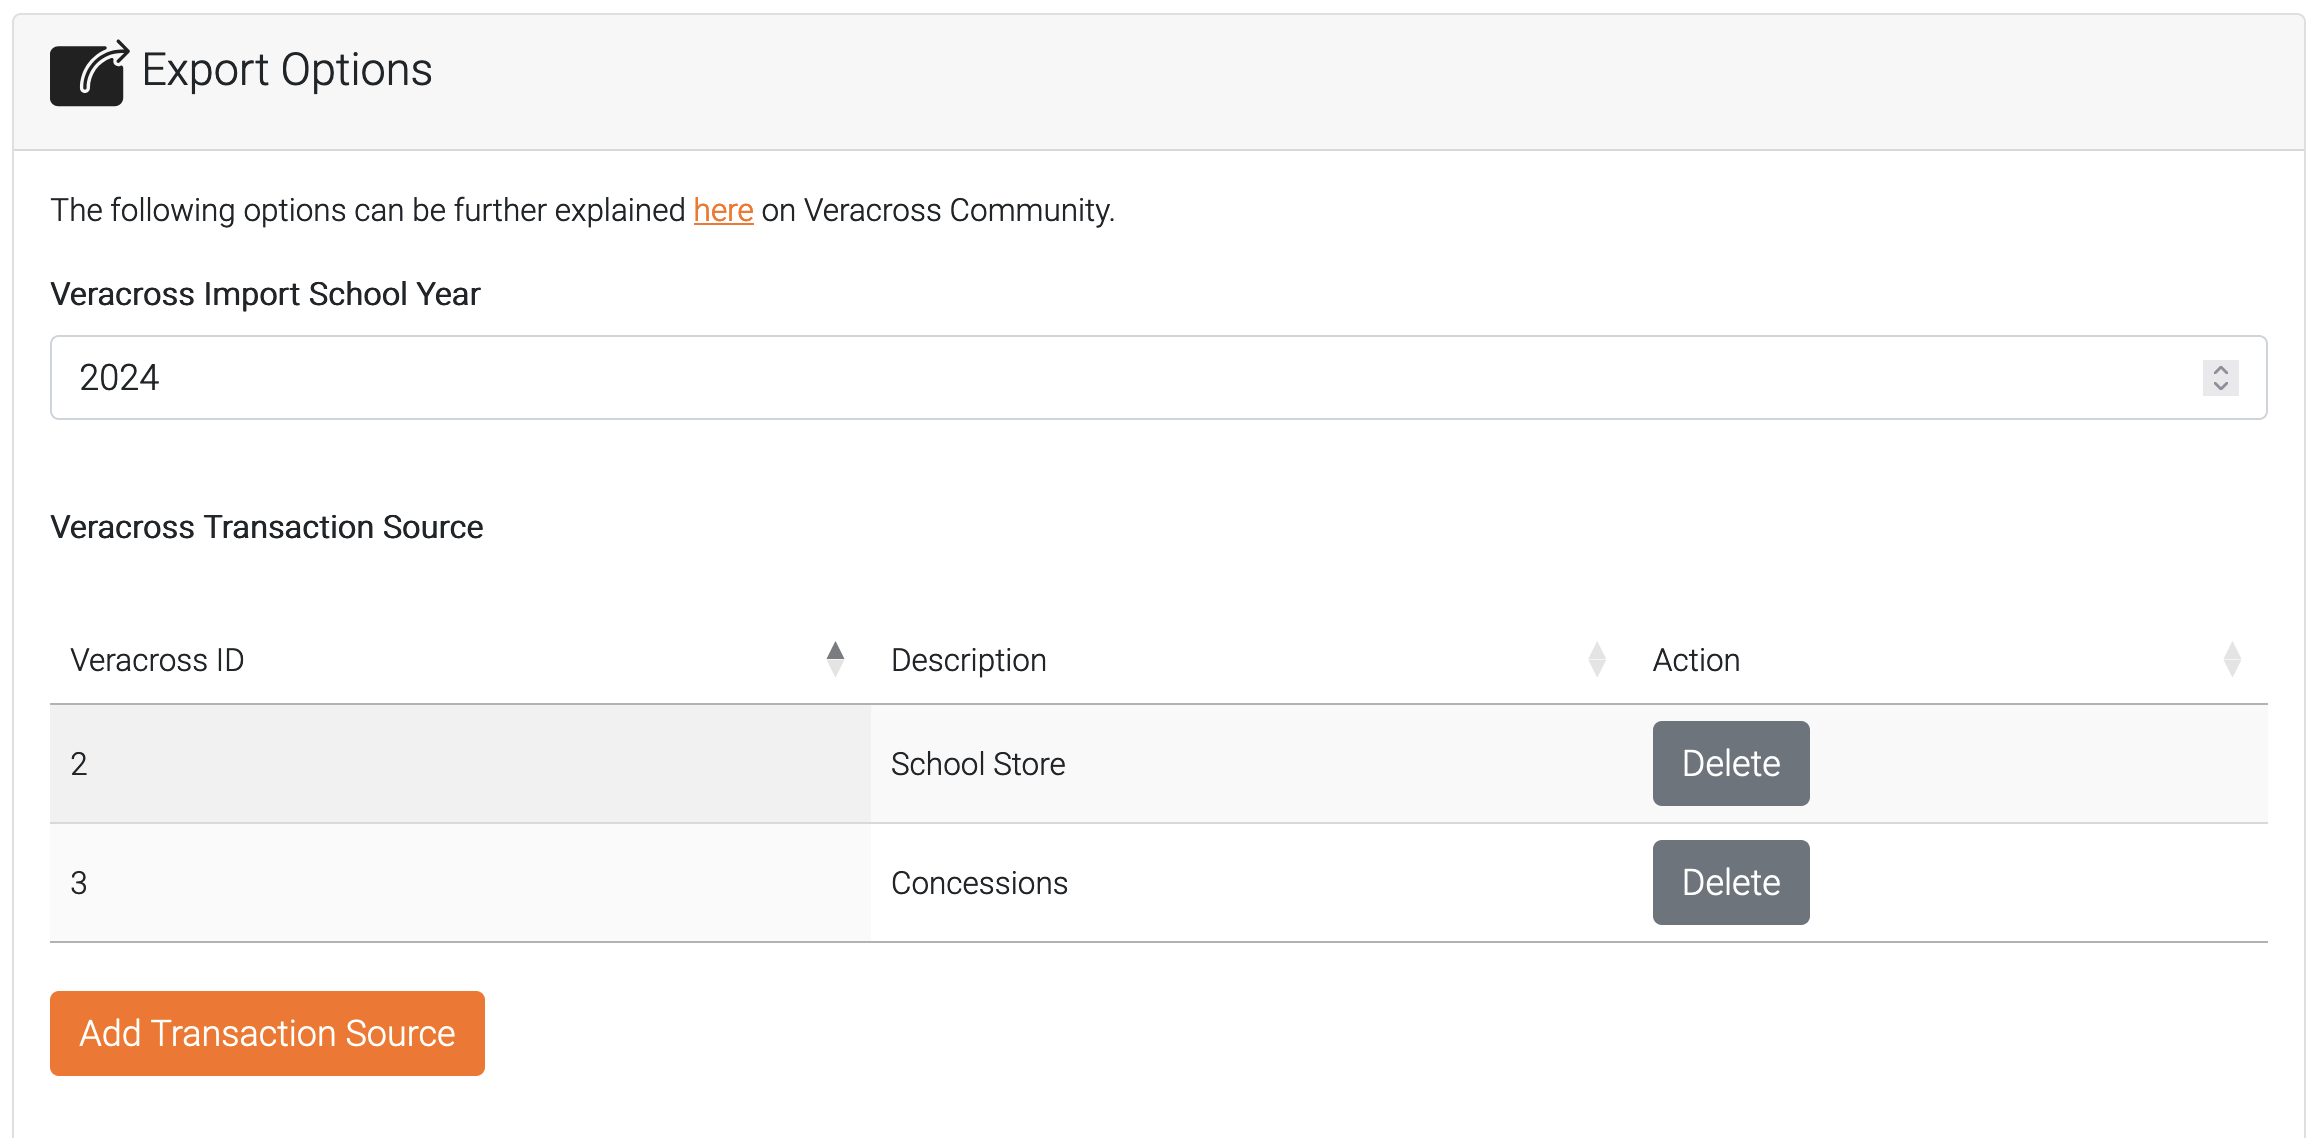
In this section are a few required fields that help properly format the export file for Veracross.
More information about these fields can be located in the Veracross Community.
As of this writing, these fields are not accessible through the Veracross API. To work around this datashutl allows you to store a mapping of the Veracross ID numbers that are required with more user-friendly name. These values will then be made available in Exports.
Import School Year
This is the current student billing school year in Veracross.
Transaction Source
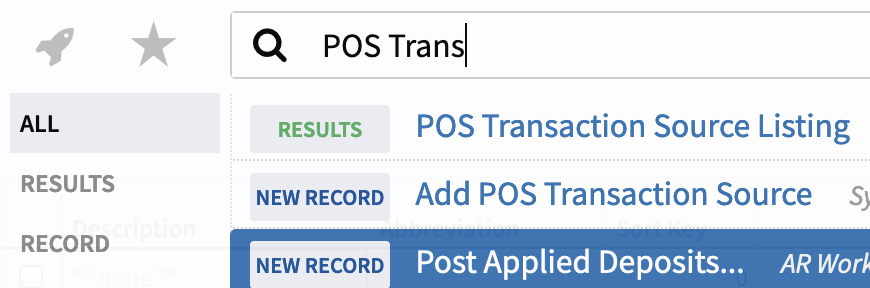
This field is custom for each school. To locate your Transaction Sources, login to Axiom Accounting, and search "POS Transaction Source Listing" query.
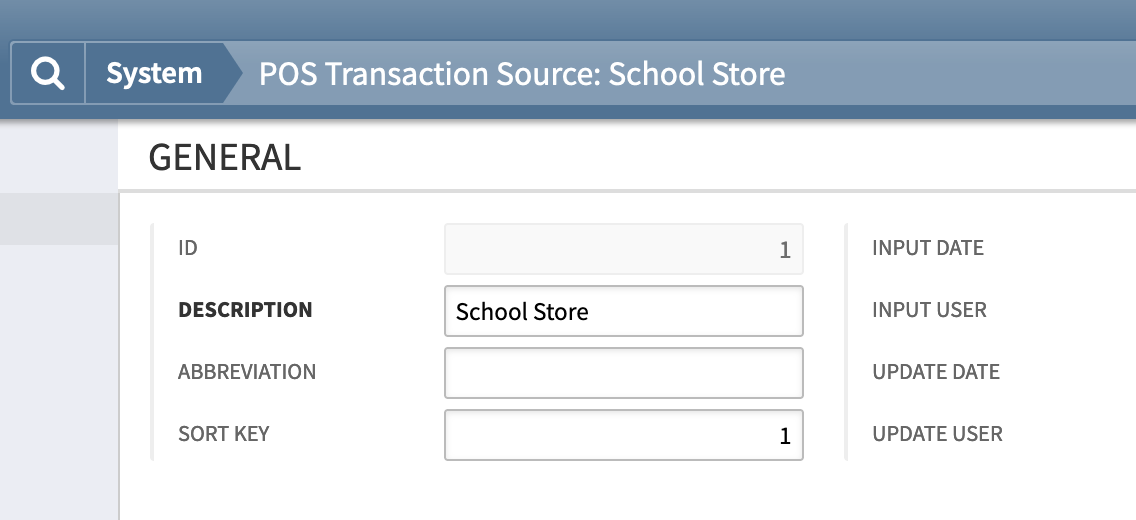
To locate the Veracross ID, select the POS Transaction Source in the query and locate the ID field.
Save the values of the sources you need in the Transaction Source table. The name doesn't need to match what is in Veracross, only the ID number.
- Click "Add Transaction Source".
- Enter the ID number located in Veracross.
- Enter a description that explains what this ID is used for.
Transaction Type
Generally these values will be the same for all schools. Veracross recommends:
transaction_type: 1 = Purchase; 2 = Credit; 3 = Payment
Catalog Item
This table is a mapping of your Veracross Catalog IDs located in Axiom Accounting.
To locate the catalog ids, search for "Catalog Item List" in Axiom Accounting.
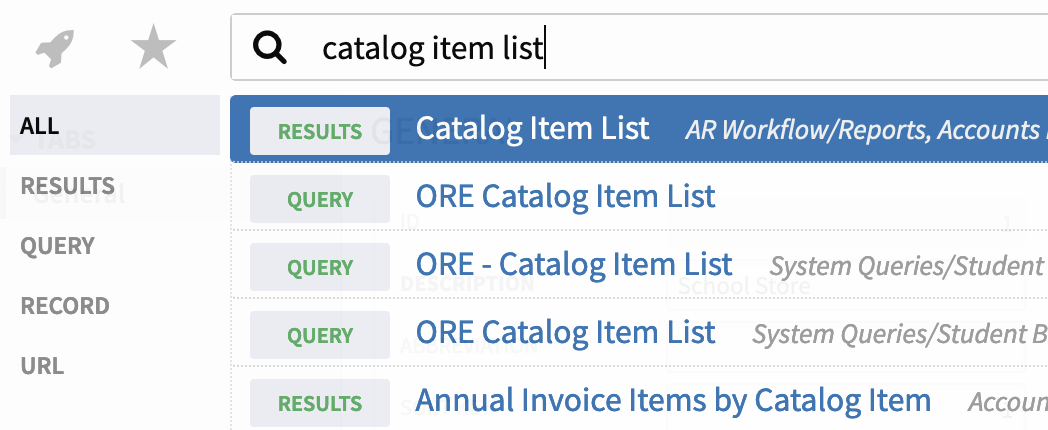
Add all the catalog items you will need to charge sales to in student billing. The name doesn't need to match what is in Veracross, only the ID number.